Be Part of Something Truly Extraordinary with the PlayCase!
I’m beyond excited to share something that’s been a dream of mine since the iPhone launched in 2007 – a dream that eventually became the PlayCase. Back then, I always knew emulators would eventually make their way to touchscreen devices. However, I was afraid that the lack of tactile feedback would take away from the experience. While I always kept my phone jailbroken and had whatever emulator I could find installed, I never invested much time in it and gravitated more to other handheld devices for my gaming. I always thought that the best gaming device should be the one that’s always with you, but unfortunately, a touchscreen only device did not deliver the experience I wanted.
The Birth of an Idea
Back then, I loved the idea of playing classic games on my first smart phone (the horrible BlackBerry Storm), but something crucial was missing — the tactile feel of a button. While I’ve been an iPhone user since the iPhone 7 and always kept my phone jailbroken to keep up with the latest emulators, the iPhone-to-Gameboy transformation dream laid dormant in the back of my mind.
Fast forward to April 17, 2024: thanks to shifting iPhone app store policies brought on by the EU, Delta, the popular console emulator, was officially released from the app store and quickly rose to number 1 on iOS download charts, with RetroArch right around the corner. The moment I learned the news it felt like a lightning bolt struck through me — the teenager with the iPhone-Gameboy-Transformer dream had serendipitously, over the course of the last 17 years, developed the skills, knowledge, and just recently owned the technology needed (a few 3D printers) to bring his 16 year old self’s vision to life. So, without hesitation, I got to work.
The Journey to PlayCase
Though the PlayCase has only been in development for around two months, it embodies 17 years of thought, experience, and passion. The last two months were about transforming those brewing ideas from paper into a physical product. No time was wasted; countless hours were spent testing, iterating, starting over, and losing sleep to make the PlayCase the best it could be.
From Concept to Reality
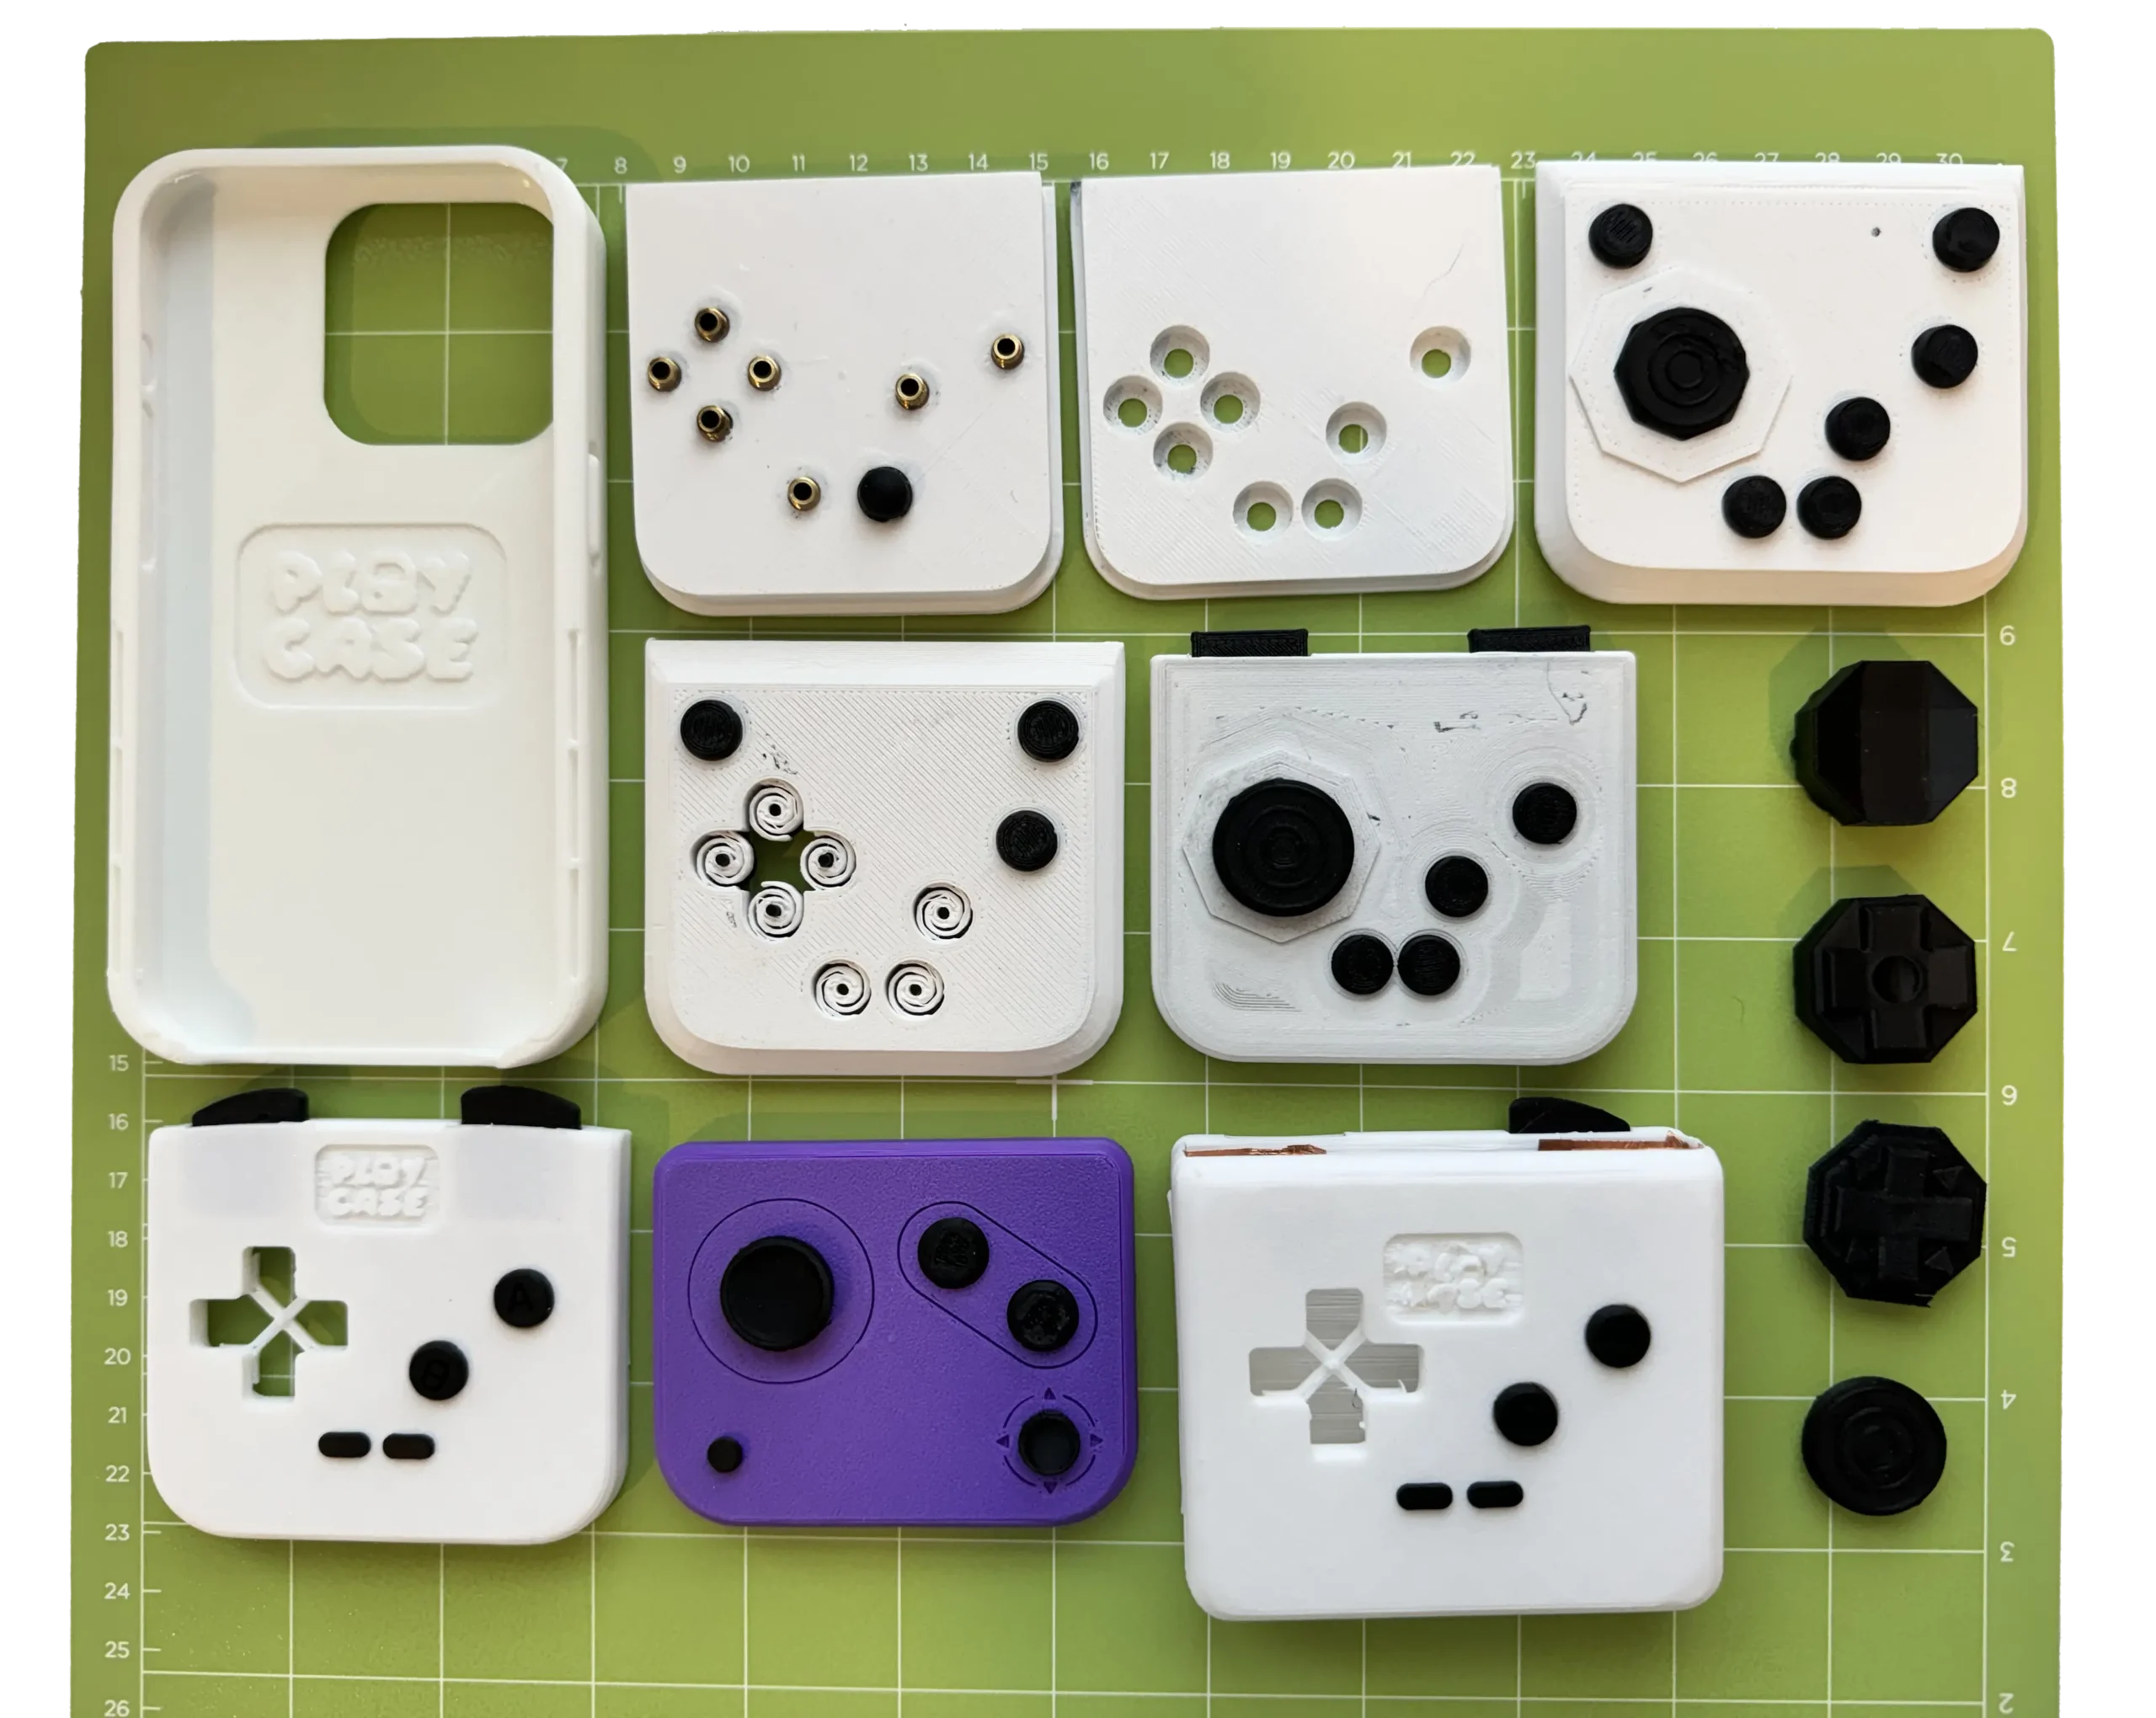
The PlayCase began its journey as a simple rectangle and half a phone case with an extension to slot the rectangle into.
There was no tactile feedback, no buttons – just an idea where there could be an extension of the screen, something physical to interact with. This rudimentary prototype evolved into an actual phone case made with TPU (commonly used in phone cases), and a faceplate with “buttons” (which were simply the nibs found on touchscreen styluses) that could slide into the case. This seemed like a promising initial solution until I noticed it was scratching the screen protector of my phone. The design had to continue to be refined; it needed to be something that attached to the case without causing damage to the screen. The buttons needed movement. They needed to be tactile, feel like a real controller.
The First Failure
The next test felt like it was an obvious, simple and genius one – just take some replacement parts from a real controller and pop them on the phone. Game controllers use conductive conductive pads, so it should work – right?
Unfortunately, it didn’t. Why didn’t it work? Why wouldn’t the conductive pads under the silicone register touch events on the touchscreen? As it turns out, while touchscreens and game controllers share some similarities in the materials used to create interaction events, the way they use these technologies are vastly different.
I’m no mechanical or electrical engineer, so I am in no way qualified to accurately describe the differences between the two, but I will say this – game controllers, which are framed around a PCB, use conductive button pads to send input signals to the device it’s connected to – when you press a button or move a control on the gamepad, the conductive pad completes a broken circuit on the PCB, then sends an electrical signal to the connected device, which interprets the input and performs the corresponding action in the game. The conductive pad is shielded by a silicone or rubber. By design, the conductive pad for the button being pressed is the only part allowed to make contact with the PCB for its specified button to complete its function. If it wasn’t shielded by an inductive material, it could possibly register events without the user’s interaction – and gamers wouldn’t want that.
On the flip side, modern smart phones use capacitive sensors, which detect a change in the electrical current around the touchscreen when you… touch the screen. It requires an electrically charged element – like your finger – to make these electrical currents change around the sensor and register a touch event. You can extend the electrically charged element (your finger) if there’s a continuous line of conductive material between your finger and the screen, but if there’s a break in the chain, it’s game over. Silicone and rubber found in game controller pads are insulators. They break the chain. They’ll never work. The idea to use game controller silicone pads had to be abandoned.
The First Breakthrough
So then, how do you take the idea of controller button pads and turn it into something that can be used on a touch screen? The first step was discovering conductive 3D print material.
3D printer filament can be mixed with all sorts of other materials – there is wood PLA, carbon fiber PLA, metal PLA, marble PLA – even conductive PLA and conductive TPU. Which meant that I didn’t have to conform to some other prefabricated conductive material (such as stylus nibs) to make this work. I could design the whole thing myself, top to bottom.
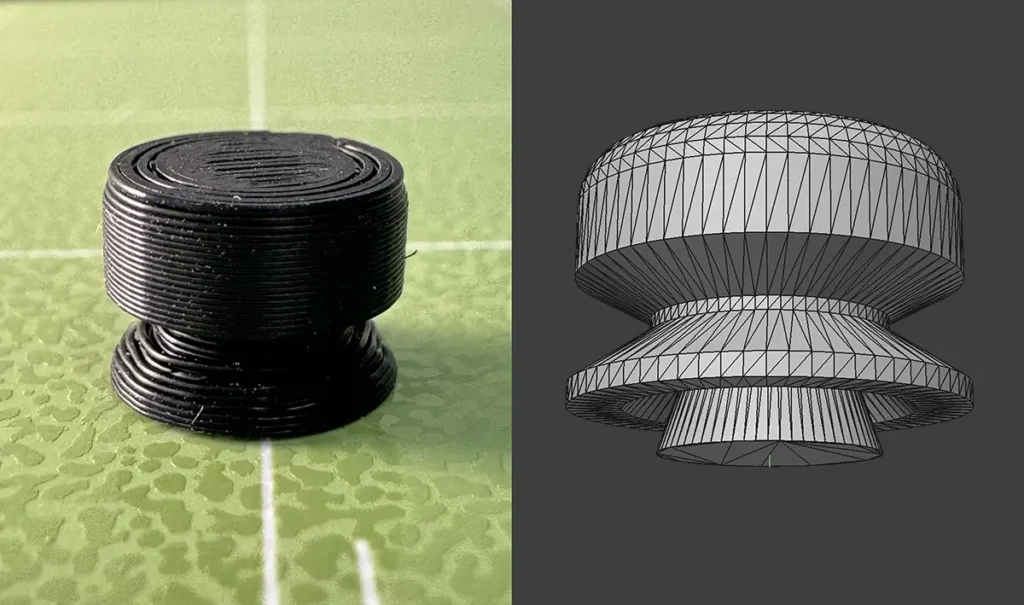
My next move was to try to create a button that functioned similarly to a game controller button pad. The button would have a rim that rested on the faceplate and was printed with conductive TPU, which is a flexible material, so when it was pressed down, it would touch the phone screen.
Again, unfortunately, this didn’t work – it couldn’t attach to the faceplate without printing multiple parts and screwing or gluing them together,
It wasn’t until I was discussing the concept with a friend that I came to the realization that I could try to use the material properties of the plastic I was printing in my favor. PLA is not completely ridged once printed – it has some tolerance for flex. So, in theory, I could use the faceplate itself as a framework for giving the buttons motion. And just like that, things were starting to come together – the Playcase now had real, articulating buttons. I had also been researching other attempts at creating physical interactions on a phone screen, such as this one, which can be purchased with a quick keyword search on Amazon. I tried simply printing my own version of the flat spring used to allow analog sticks such as the example to move – and lo and behold, it worked. I was able to create a faceplate that integrated an analog stick and buttons.
D-pad Dreams
Having an analog stick and buttons was great and all, and I could have stopped there as the final product, but I wanted to make sure that the PlayCase provided a truly authentic experience. As always, the solution seemed right around the corner – but it was in fact one of the hardest challenges I had to face.
There were two problems that needed to be solved –
- Make sure the D-pad can be attached to the faceplate
- allow the D-pad to ‘reset’ to the center when idle
The analog stick was simple – use a male/female design. That allows the analog stick to remain attached to the print-in-place spring. But the D-pad had to have free motion around its center axis in order to get to where it needed to go. Furthermore, it had to be housed into the faceplate.
Turns out, I was in luck – reddit user fredsvanelli was working on his DeltaBoy controller, which uses hair ties to keep his buttons in place – and uses a matrix of connections to spring the D-pad into place. Of course – rubber bands! While the design needed to be updated to work for the PlayCase, this set me on the right path.
Triggers in the front, triggers in the back
One of the toughest challenges in designing the PlayCase was figuring out the triggers. I started by making them buttons on the faceplate itself – but that didn’t make the experience any better than using a touch screen, as certain button combinations in some games were designed to require a combination of simultaneous inputs with your thumb and index finger. So I figured out a way to put real triggers on the faceplate itself. That worked, as it provided a way to use multiple digits for input, but forced an unnatural grip, and ultimately that experience was too awkward to move forward with.

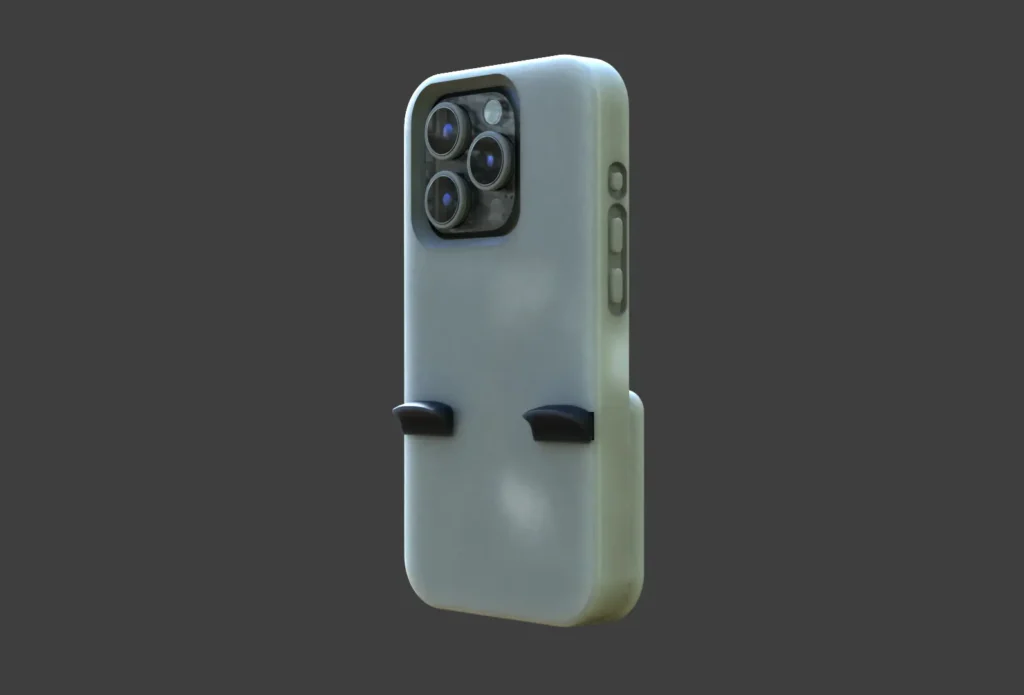
So I knew what had to be done – figure out a way to put triggers on the back. The solution seemed simple based on the nature of how touchscreens worked – but as you could guess – there ended up being more design challenges to solve. Originally, I planned to just make the triggers touch based by integrating some conductive material into the case itself and having it connect to the faceplate when attached. But as it turns out, the titanium body of the iPhone 15 Pro is, similar a human finger, conductive. As soon as the two pieces of conductive material touched each other, the phone thought a button was being pressed. I had to come up with another solution.
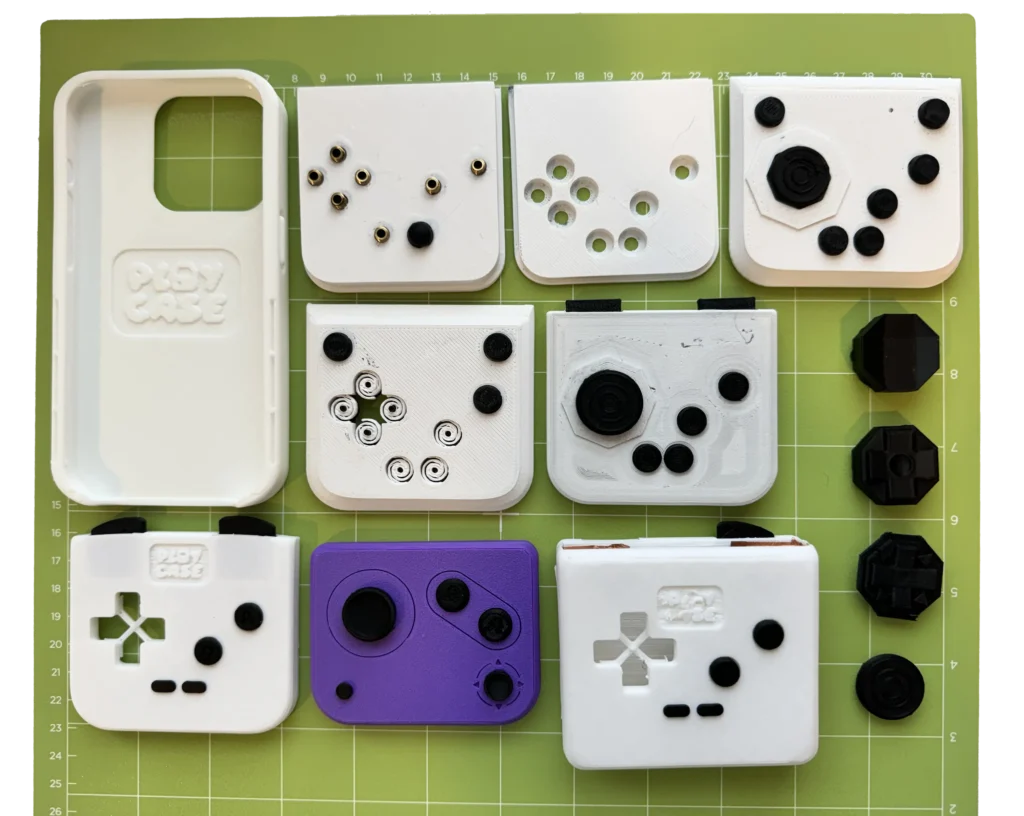
The Final Product

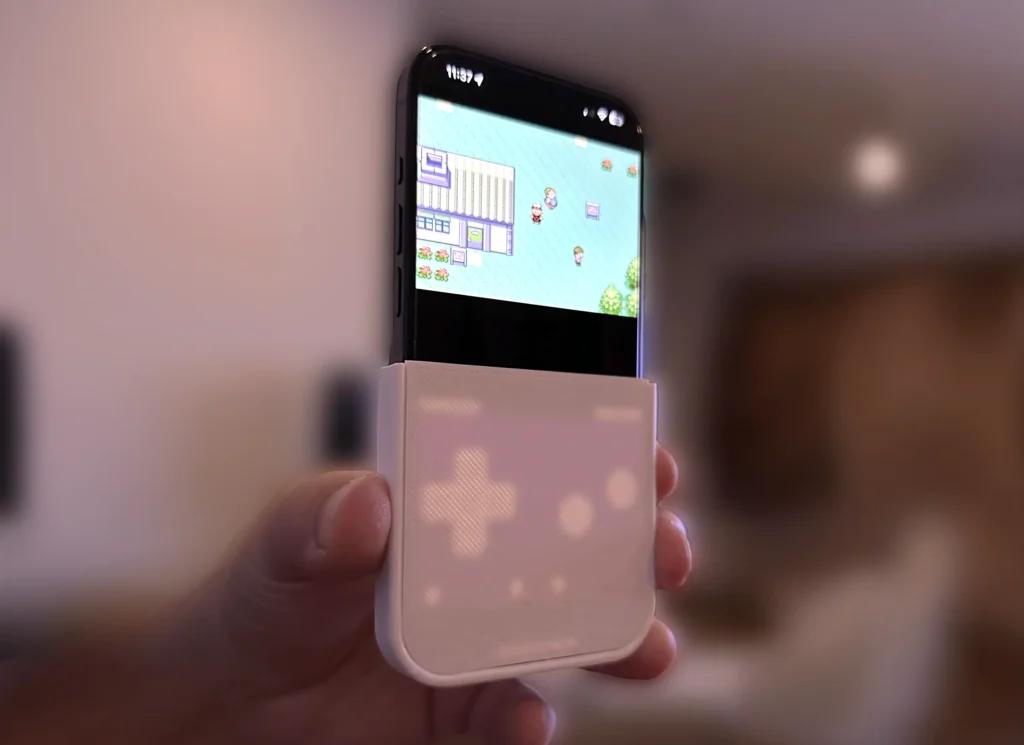
Today, I’m thrilled to introduce the PlayCase system: a phone case and a series of faceplates designed to give you the tactile feedback of a traditional controller while playing emulated games on your iPhone 15 Pro. Whether you’re racing against Bowser in Mario Kart Super Circuit, saving the world from Gygas in Earthbound on Super Nintendo, or tackling the intricate dungeons in Ocarina of Time on Nintendo 64, the PlayCase has got you covered.
Why I Love It, and you will too
• Tactile Feedback: Say goodbye to the slippery touch controls and hello to the satisfying click of physical buttons.
• Versatility: With different faceplates and inserts, you can customize your gaming experience for various consoles.
• Portability: The PlayCase is sleek and portable, making it easy to carry around and game on the go.
Join the Adventure
This isn’t just a product; it’s a journey we’re embarked on together. From the initial idea in 2007 to the launch today, the PlayCase is a testament to the power of dreams, hard work and determination. I can’t wait for you experience it.
Thank you for joining us on the PlayCase adventure! If you’d like to purchase a PlayCase, please visit our shop. To support our efforts and help accelerate the development of PlayCase for other phone models, check out our Ko-Fi page!